i'm re-making a trailer for my machine phase project that i started back in 2006. i want to upgrade the look and use some of the new tools and techniques i've learned over the past few years as well as finishing it this time. the link below is for the original trailer, it's a 122mg mov file:
----------
my good friend TIM BOXELL did the storyboards. i've made some changes along the way:
----------
shot 01 the waterfall is first. i'm going to re-make the cliffs. i used the previous max files and the corresponding cameras and placement of objects as my starting place. i created a new plane object and placed it on the right side. the length and width and set to 100 segments each, the density setting, similar to meshsmooth, is set to 12. we will be using displace to create to rock formations and thus need lots of topology.
----------
next i created the two displacement masks that will create the cliff's form. i used the gradient ramp for both, the one on the left is the main rock formation and the one on the right is the mask.
the resulting look.
the set up for the holes in the formation.
this is the resulting displacement.
and finally the render w/some rock textures applied.
----------
next i'd like to populate the surface w/different types of foliage. instead of using high polys trees i'm going to use a particle system to generate shrubs of various textures scattered across the surface of the rock form.
the first step is to create a copy of the cliff and name it cliff emiter01. right click on the object and uncheck Renderable, we don't want to see this object at render time. i then selected faces where the foliage would be emitted.
----------
i created a pf source, you can see in the set up it's very simple. i used position object and selected faces as the origin of from which the particles will emit (locked onto the rock object), the shape is a simple sphere w/mapping, some scale to create the different sized plants and lastly a multi sub object material that is applied at random. the textures are various images of plants and leaves that are masked in the opacity slot by various black and white images of leaves. (i also created the cliff on the other side by copying the first one and changing the noise values for displacement so they each look a bit different.)
----------
i used vray w/the default sun light and camera settings.
----------
the final result.
----------
the main waterfall is created w/particle flow and is rendered on it's own w/the standard max scanline renderer.
----------
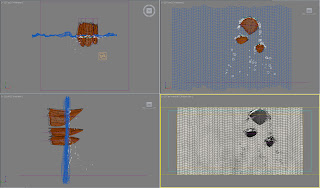
next is the set up for the rocks poking out of the main waterfall and creating about 6 or 7 smaller waterfalls. the scene contains deformed spheres for the rocks, lower rez copies for the deflection objects, a deforming plane that keeps particles from going behind the waterfall, the spacewarps drag, gravity and 4 deflectors that upon collision delete particles. this scene is also rendered using the standard max scanline renderer.
----------
the particle flow layout. using a large number of smaller particles that are emitted from thin strips of polys right above each rock, using the spacewarps drag and gravity each particle is pulled downward and either collides w/a deflector that deletes it or bounces it off the rocks and to the next deletion plane.
----------
i added another particle system to create the foliage on the rocks just like the cliff example. this is the final render.
the final image has a few extra elements added, the falling sphere and resulting trail (didn't make any changes), the bird (no changes) and 3 trees in the foreground that have animated noise modifiers added to a soft selection of vertices to create some wind like movement.
i'll upload the resulting animation as soon as it's done!
----------


No comments:
Post a Comment